Recently we blogged about creating low carbon Umbraco websites using next.js. The article received a lot of attention inside of the Umbraco community and beyond. We thought we’d create a guide to the Umbraco + next.js implementation that underpins that website.
This article details how to implement a next.js front-end for Umbraco. The article uses Umbraco v13, and next.js v14. It’s aimed at Umbraco developers looking to try out lightweight front-ends for their websites, but should be useful for next.js developers looking to work with Umbraco too.
An example generated front-end can be found here: https://etive-mor.github.io/umbraco-nextjs-demo/. The code repository can be found here: https://github.com/Etive-Mor/Umbraco-NextJs-Demo.
What is next.js?
next.js is an open-source React framework from Vercel. The framework can be used to build modern front-end applications or complex server-side applications using either Typescript or Javascript. next.js has a well maintained documentation site. Its versatility and support for both of the major scripting languages make it a great choice for a lightweight web application.
The framework supports Static Site Generation (SSG), a feature which pre-generates HTML pages for websites, based on an external API. Through these external APIs, the framework can generate a front-end website for any arbitrary CMS data. As the front-ends in questions are pre-generated, they can be hosted on minimal webservers with very low energy consumption requirements.
What is Umbraco?
Umbraco is an open source .net CMS. It has an intuitive and user-friendly backoffice, which makes content editing a breeze. Developers can extend and customise the server-side application to suit a multitude of business requirements, to support this extensibility, Umbraco has an enormous & constantly updated documentation site. With both a user-friendly editing experience, and a massively extendable application, Umbraco is a natural choice for enterprises to build and host their web applications. The CMS has historically been less well placed to create SME & Micro-SME websites, as hosting & maintaining .net applications can be cost prohibitive compared to other CMS applications like WordPress.
Recently, Umbraco introduced native support for a Content Delivery API, which exposes the website’s content over a well-defined API. The new feature allows developers to use frameworks such as next.js to generate static sites, reducing server costs and energy consumption.
Setting up the projects
The site will contain two projects, one Umbraco back-office application, and one front-end next.js client application.
Installing Umbraco
There are a few different options for installing Umbraco, outlined in the official documentation. This guide used VSCode, but will work with any of the documented techniques.
Enter the following commands into VSCode’s terminal:
# Install the latest Umbraco templates
dotnet new -i Umbraco.Templates

# Create a solution for your Umbraco site
dotnet new sln --name "UmbracoNextJsDemo"

# Install an Umbraco project
dotnet new umbraco -n "UmbracoNextJsDemo.Site" --friendly-name "Administrator" --email "demo@example.com" --password "Test123456@" --development-database-type SQLite

# Add the project to the VS Solution
dotnet sln add "UmbracoNextJsDemo.Site"

# Run the project
dotnet run --project "UmbracoNextJsDemo.Site"
This application also installs uSync to make sharing the demo a bit easier.
# install uSync
dotnet add package uSync

#Run the project
dotnet run --project "UmbracoNextJsDemo.Site"
Install next.js
Steps for this repository are outlined below, but it’s worth reading through the the next.js installation page for detailed instructions. Before continuing you’ll need to install Node.js version 18.7 or higher
Install npx
To install npx using npm, run:
npm i npxCreate your React NextJS app
Create a new NextJS app, using the built-in create-next-app feature. It runs you through a series of prompts, then builds the app for you according to your preferences
npx create-next-app@latestThis app has used the following configurations:
- What is your project named? umbraco-next-js-demo-client
- Would you like to use TypeScript? Yes
- Would you like to use ESLint? Yes
- Would you like to use Tailwind CSS? Yes
- Would you like to use `src/` directory? Yes
- Would you like to use App Router? (recommended) Yes
- Would you like to customize the default import alias (@/*)? No
- What import alias would you like configured? @/*
Run the next.js client app
To run the application we’ve just created, run the following command from the root of your project:
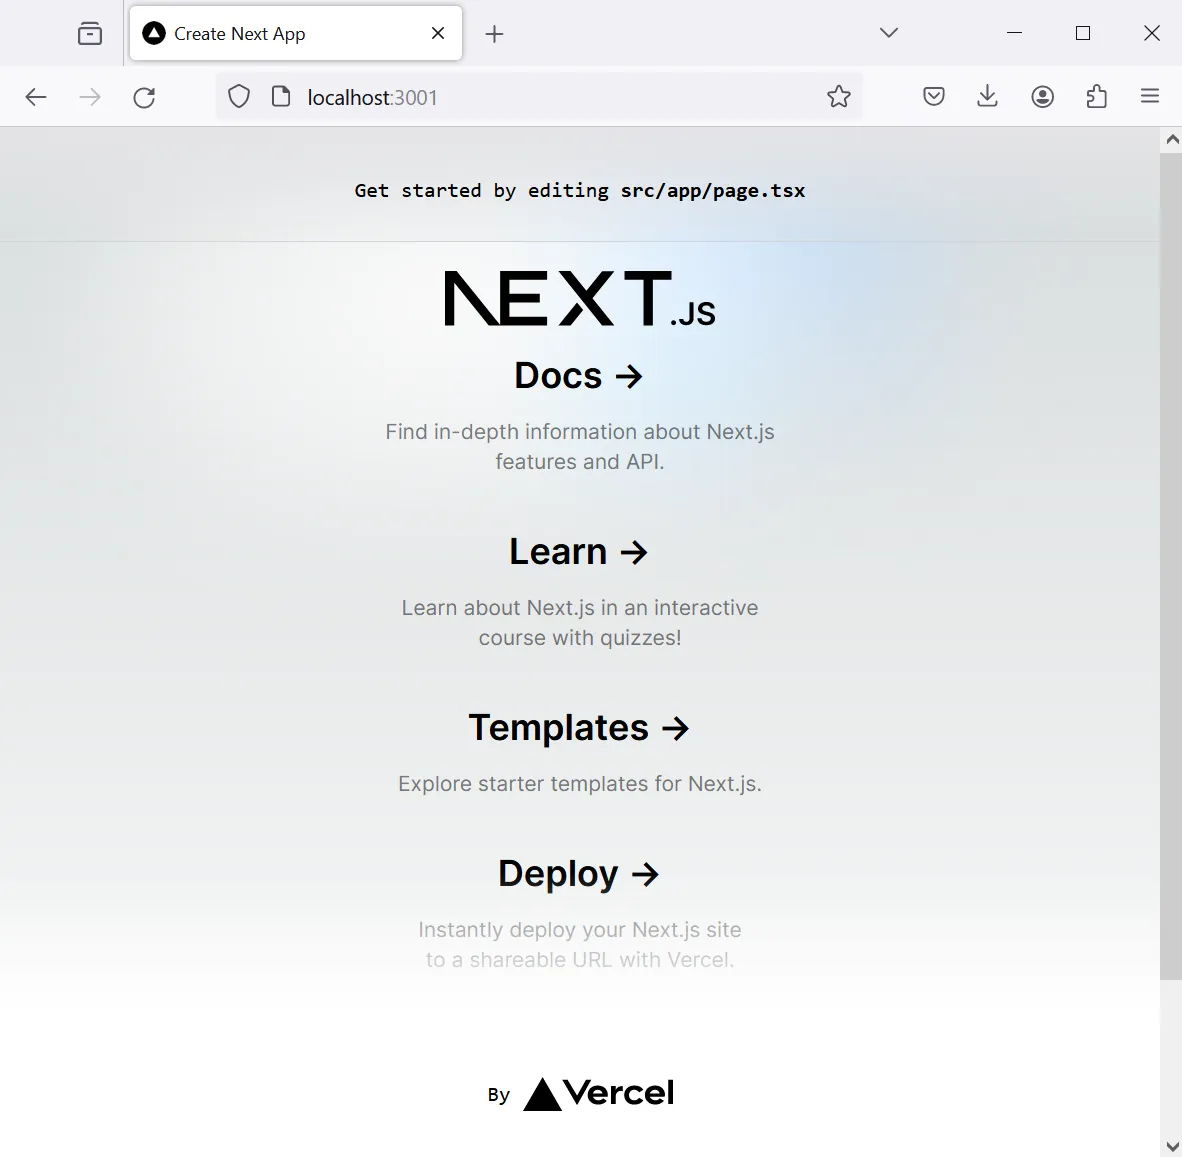
npm run --prefix .\umbraco-next-js-demo-client\We should now see the default next.js page at localhost:3000.
Configuring Umbraco’s Content Delivery API
Umbraco’s Content Delivery API configuration is straightforward. For Umbraco v13 sites, in your Umbraco application’s appsettings.json file, add the following config to the Umbraco:CMS node
"Umbraco": {
  "CMS": {
    "DeliveryApi": {
      "Enabled": true,
      "PublicAccess": true,
      "ApiKey": "", // only required if PublicAccess is set to false
      "DisallowedContentTypeAliases": [
        "alias1",
        "alias2",
        "alias3"
      ],
      "RichTextOutputAsJson": false
    },
  }
}
To help understand the properties, their functionality is described below:
| Property | Purpose | Type |
|---|---|---|
| DeliveryApi:Enabled | Turns the DeliveryAPI on when set to true, and off when set to false | Bool |
| DeliveryApi:PublicAccess | Restricts access to the DeliveryAPI behind an API Key when set to false, and allows any connection when set to true. | Bool |
| Umbraco:CMS:DeliveryApi:ApiKey | The key used to authorise access to the API when PublicAccess is set to false. | String |
| DeliveryApi:DisallowedContentTypeAliases | Removes content of specific document types from the DeliveryAPI’s result set by their DocumentTypeAlias. | Array of Strings |
| DeliveryApi:RichTextOutputAsJson | Configures the DeliveryAPI to output RTE data as Json when set to true, or as HTML when set to false | Bool |
Querying the Umbraco Content Delivery API
Launch the Umbraco site with the following terminal command
dotnet run --project "UmbracoNextJsDemo.Site"You should now have a running Umbraco site, and be able to visit the API’s Swagger page at http://localhost:59970/umbraco/swagger/index.html?urls.primaryName=Umbraco%20Delivery%20API. The swagger page will only be rendered in non-production environments.
Understanding the Umbraco Content Delivery API results
By default, the Delivery API will always return the following content for any node in Umbraco
| Data Alias | Data Description |
|---|---|
| name | The name of the content node in Umbraco |
| createDate | The date the content node was created |
| updateDate | The date the content node was most recently updated |
| contentType | The documentTypeAlias of the content node |
| properties | All requested properties on the content node, for example in the API request, if you pass &properties=[metaDescription,metaTitle], this node will contain those two properties. |
| route | Detailed information about the content node’s url path. Describes both the path of this node, and the node’s top-level ancestor (the root document). |
| cultures | Provides information about the other cultures this node is available in. |
Sample GET requests for the Umbraco Content Delivery API
Some handy sample requests are outlined below, along with details of their functionality.
Get All Content
The following query will get a collection of 10 items from the site, and include all properties on the documents (paging is discussed later in the article).
http://localhost:59970/umbraco/delivery/api/v2/content?skip=0&take=10
Get Content By Path
The following query will get a single content item by its path (in this case the page at /home/ ). The query will include default properties, and those listed in the properties[] array.
Get Content By ID
The following query gets a single content item by its Guid ID (922e4a17-398e-4992-bc09-975ccbd8051e in this case). It will include default properties, and the metaName property, as requested in the properties[] array
Get Content’s Children
The following query gets the first 10 children of the content item with ID 922e4a17-398e-4992-bc09-975ccbd8051e. The query includes the metaDescription property, as requested in the properties[] array.
Get Content’s Descendants
The following query gets the first 10 descendants of the content item with ID 922e4a17-398e-4992-bc09-975ccbd8051e. The query includes the metaDescription property, as requested in the properties[] array.
Get Content’s Ancestors
The following query gets the first 10 ancestors of the content item with ID 922e4a17-398e-4992-bc09-975ccbd8051e. The query includes the metaDescription property, as requested in the properties[] array.
Paging the Umbraco Content Delivery API
The API allows paging, using the Skip and Take parameters. These parameters are accepted on any request which returns a collection of documents. For example the following Descendants query returns the first 10 items:
Get the first 10 items in a query
Get the 3rd 10 items in a query
The parameter skip can then be adjusted to get subsequent pages. For example the following Descendants query skips the first 20 content items (the first two pages), then returns the next 10:
Get the first 50 items in a query
Similarly, the parameter take can be adjusted to query more of the site. The following Descendants query will return the first 50 items.
If the limit is set too high, this will result in enormous JSON objects, and poor performance, so it’s best to stick to small pages.
Querying custom properties in the Umbraco Content Delivery API
The custom user-entered data for your Umbraco content are included in the properties section.
Get All Properties
You can retrieve all properties by removing the fields=properties[] array from the request entirely. Note that this could result in very large returned entities.
Hide All Properties
Alternatively, you can hide all properties, by including fields=properties[null] in the request. Note that if you have a document property with an alias null, that will be returned.
Get Specific Properties
To query for specific properties, enter an array of propertyAlias values into the properties[] array. In the example below, fields=properties[metaDescription,metaTitle] will return only those two document properties.
The Content Delivery API’s official Umbraco documentation has considerably more settings than detailed in this article, including Filters, Sorting, and property Expansion. It’s well worth a read if you’re considering using next.js in your next Umbraco project.
Routing in next.js
next.js v14 has an initially confusing router, however once you start working with it, it becomes straightforward. By convention, webpages are always rendered by files named ./page.tsx, and their routes are nestable. Dynamic routes are handled with [square-bracket] directory names. Catch-all dynamic routes are handled with […ellipsis-square-bracket] directory names. Note that it is literally the folder/directory names which are wrapped in square [brackets], and prefixed with ellipsis […brackets].
Page.tsx files beneath [square-bracket] directories act as a wildcard dynamic route for that URL segment - so if the [square-bracket] route is at the first level, http://localhost/wildcard-segment/ will render using [square-bracket]/page.tsx. However the route will not catch http://localhost/wildcard-segment/extra-segment
To handle nested dynamic routes, we need […ellipsis-square-bracket] directories. These act as a catch-all wildcard dynamic route for any URL.
If the application has a mix of [square-bracket] and […ellipsis-square-bracket] directories, next.js will pick [square-bracket] first, and then fall back to […ellipsis-square-bracket]. If no route is found, the site will render the 404 page.
| File Path | Page Path |
|---|---|
| ./app/page.tsx | http://localhost/ |
| ./app/hello-world/page.tsx | http://localhost/hello-world/ |
| ./app/[slug]/page.tsx | http://localhost/dynamic-route/ |
| ./app/[…slug]/page.tsx | http://localhost/any/dynamic/route/ |
| ./app/hard-coded-segment/[slug]/page.tsx | http://localhost/hard-coded/dynamic-route/ |
| ./app/hard-coded-segment/[…slug]/page.tsx | http://localhost/hard-coded/any/dynamic/route/ |
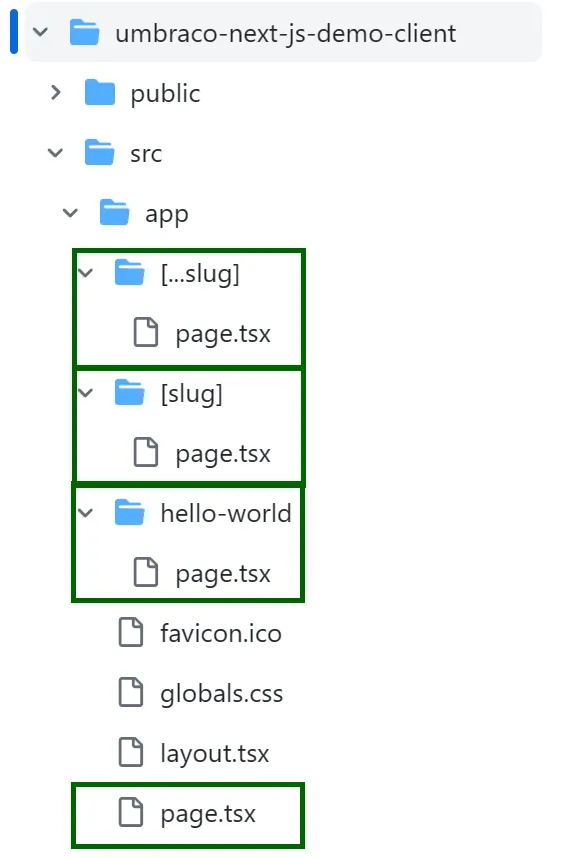
You should be able to see this folder structure in action here: https://github.com/Etive-Mor/Umbraco-NextJs-Demo/tree/673b2718d4b793f40f31ae2b89eeed1fa6b3f9d6/umbraco-next-js-demo-client, with the following folder structure under ./umbraco-next-js-demo-client/src/app/.
In the example, we’ve used [slug] and […slug], though it’s possible to have any name. In your /[slug]/page.tsx file, you’ll be able to access the slug variable through params, which will be discussed in part 6.
A TypeScript service layer for Umbraco
Next we need to build a service layer for Umbraco. Create a new file at ./src/app/services/services.umbraco/services.umbraco.content.ts (note that this is a .ts file, not a .tsx file). This method will control how we interact with Umbraco. The full file can be found in the github repo here.
For the most basic sites, we need three methods. One to get all content, another to get specific pieces of content, and a final one for Children/Descendants/Ancestors queries.
Constant Values
For brevity, the file contains some hard-coded constant values. It’s important that you move these out to an appropriate environment file. NextJS has very good documentation for managing environment files. The const values we’ll need are:
const cacheStrategy = 'force-cache'; // 'force-cache' or 'no-store'
const UMBRACO_URL = 'http://localhost:59970'; // replace with your Umbraco URL
const UMBRACO_API_KEY = 'your-api-key'; // replace with your Umbraco API Key if you're using the protected endpoint model
const UMBRACO_CONTENT_LANGUAGE = 'en-US'; // replace with your Umbraco API Key if you're using the protected endpoint model
const values used in the Umbraco Content Delivery API Typescript Service
Get All Content Paged Async
The method queries the API for all content pieces.
/**
 * Gets all site content in pages
 *
 * @param take The number of items to select from the content tree. Defaults to 10
 * @param skip The number of items to skip from the content tree. Defaults to 0
 * @param previewMode Set to `true` to see the pages in preview mode. Defaults to false
 * @returns A collection of content items
 */
const getAllContentPagedAsync = async (take: number = 10, skip: number = 0, previewMode: boolean = false) => {
    const data = await fetch(`${UMBRACO_URL}/umbraco/delivery/api/v2/content?skip=${skip}&take=${take}&fields=properties[contentBlocks,metaTitle,metaKeywords,metaDescription,relatedBlogPosts]`,
    {
        cache: cacheStrategy,
        method: 'GET',
        headers: {
            'Start-Item': 'Website',
            'Api-Key': `${UMBRACO_API_KEY}`,
            'Accept-Language': `${UMBRACO_CONTENT_LANGUAGE}`,
            'Preview': `${previewMode}`,
        }
    });    const siteContent = await data.json();
    return siteContent;
}
Get Page Async
This method queries the API for a single piece of content by its path.
/**
 * Gets a single page by its pagepath
 * @param pagePath the page path (for example "/home")
 * @param previewMode set to `true` to view the content in preview mode. Defaults to `false`
 * @returns A single content item
 */
const getPageAsync = async (pagePath: string, previewMode: boolean = false) => {
    const url:  string = `${UMBRACO_URL}/umbraco/delivery/api/v2/content/item/${pagePath}/?fields=properties[contentBlocks,metaTitle,metaKeywords,metaDescription]`;
    const data = await fetch(`${url}`,
    {
        cache: cacheStrategy,
        method: 'GET',
        headers: {
            'Start-Item': 'Website',
            'Api-Key': `${UMBRACO_API_KEY}`,
            'Accept-Language': `${UMBRACO_CONTENT_LANGUAGE}`,
            'Preview': `${previewMode}`,
        }
    });
    const pageContent = await data.json();
    return pageContent;
}
Get Children, Ancestors, or Descendants Async
These methods query the Content Delivery API for either Children, Ancestors, or Descendants. There are three discrete public methods in the service (getAncestorsOfDocument, getDescendantsOfDocument, getChildrenOfDocument). All three proxy through the same private method (getChildrenAncestorsOrDescendants). These four methods all query based on the document’s Guid ID, rather than its pagepath, although the query can be reconfigured to work on pagepath instead.
/**
 * Gets the ancestors of a document by the document's Umbraco ID
 * @param documentId the Umbraco ID (Guid) of the queried document
 * @param skip Used for paging, configures the number of entities to skip over
 * @param take Used for paging, configures the max number of entities to return
 * @returns a collection of Umbraco documents, each of which is the ancestor of the Content item
 * @throws Error when the documentId is not a valid Guid
 */
const getAncestorsOfDocument = async (documentId: string, skip: number = 0, take: number = 10, previewMode: boolean = false) => {
    return getChildrenAncestorsOrDescendants(documentId, 'ancestors', skip, take, previewMode);
}

/**
 * Gets the Descendants of a document by the document's Umbraco ID
 * @param documentId the Umbraco ID (Guid) of the queried document
 * @param skip Used for paging, configures the number of entities to skip over
 * @param take Used for paging, configures the max number of entities to return
 * @returns a collection of Umbraco documents, each of which is the descendant of the Content item
 * @throws Error when the documentId is not a valid Guid
 */
const getDescendantsOfDocument = async (documentId: string, skip: number = 0, take: number = 10, previewMode: boolean = false) => {
    return getChildrenAncestorsOrDescendants(documentId, 'descendants', skip, take, previewMode);
}

/**
 * Gets the Children of a document by the document's Umbraco ID
 * @param documentId the Umbraco ID (Guid) of the queried document
 * @param skip Used for paging, configures the number of entities to skip over
 * @param take Used for paging, configures the max number of entities to return
 * @returns a collection of Umbraco documents, each of which is the child of the Content item
 * @throws Error when the documentId is not a valid Guid
 */
const getChildrenOfDocument = async (documentId: string, skip: number = 0, take: number = 10, previewMode: boolean = false) => {
    return getChildrenAncestorsOrDescendants(documentId, 'children', skip, take, previewMode);
}


const getChildrenAncestorsOrDescendants = async (documentId: string, childrenAncestorOrDescendantsSpecifier: string = 'children', skip: number = 0, take: number = 10, previewMode: boolean = false) => {
    if (childrenAncestorOrDescendantsSpecifier != 'ancestors' && childrenAncestorOrDescendantsSpecifier != 'descendants' && childrenAncestorOrDescendantsSpecifier != 'children') {
        throw Error(`param 'childrenAncestorOrDescendantsSpecifier' must be either ancestor or descendant. Received ${childrenAncestorOrDescendantsSpecifier}`);
    }
    if (!isValidGuid(documentId)) {
        throw Error(`param documentId must be a valid guid, received '${documentId}'`);
    }

    const url = `${UMBRACO_URL}/umbraco/delivery/api/v2/content/?sort=name:asc&fields=properties[contentBlocks,metaTitle,metaKeywords,metaDescription]&fetch=${childrenAncestorOrDescendantsSpecifier}:${documentId}&skip=${skip}&take=${take}`;

    console.log('making request to ' + url)

    const data = await fetch(`${url}`,
    {
        cache: cacheStrategy,
        method: 'GET',
        headers: {
            'Start-Item': 'Website',
            'Api-Key': `${UMBRACO_API_KEY}`,
            'Accept-Language': `${UMBRACO_CONTENT_LANGUAGE}`,
            'Preview': `${previewMode}`,
        }
    });
    const umbracoDocuments = await data.json();
    return umbracoDocuments;
}
Default SEO & Dynamic Metadata in next.js
next.js allows for either static metadata, or dynamically injected content per page. Their documentation for the feature can be found here, and is far more detailed than this post. This is the minimal implementation to introduce dynamic <title> and <meta name> tags to your site.
The aim is to have all pages generating their own dynamic SEO data, however we need to start with a default fall-back value & template. In the site’s main layout page at ./src/app/layout.tsx, we need to create and export a base Metadata object. This will be the template for our SEO data, and will also act as a default fall-back.
export const metadata: Metadata =  {
  metadataBase: new URL('http://localhost:3000/'),
  title: {
    template: '%s | Demo Umbraco NextJS Site',
    default: 'Demo Umbraco NextJS Site - A demo website created with NextJS and Umbraco'
  },
  description: 'A demo website created with NextJS and Umbraco',
}| Property Name | Purpose |
|---|---|
| metaDataBase | Sets the base directory for all URLs output in <meta> tags. For example, OpenGraph images require URLs to be fully qualified, including the domain name. |
| title:template | Sets a base template for the <title> tag. The %s property is a placeholder for dynamic injectable content. |
| title:default | The default value injected into title:template’s %s property |
| description | The value injected to the <meta name=“description”> tag |
Dynamic Metadata from Umbraco
The website’s content nodes all contain two documentype properties metaTitle and metaDescription. We can provide these metadata properties inside of the ./src/app/[…slug]/page.tsx file.
Each page in the site requests a dynamic Metadata object from Umbraco by calling GenerateMetadataAsync in ./src/app/Common/Helpers/generate-dynamic-umbraco-metadata.ts.
const page = async ({ params }: { params: any }) => {
    const thisPage = await GetPageAsync(params.slug.join('/'));

    return (<>
         {thisPage.name}
    </>)

}

/**
 * Generates the page's metadata
 * @param param0 the page's params, which must include a property params.slug
 * @returns the page's metadata
 */
export async function generateMetadata({ params }: any): Promise<Metadata> {
    return await GenerateMetadataAsync(params.slug.join('/'));
}


export default page;
GenerateMetadataAsync makes a request via the Umbraco typescript service to get the page’s content. That means we’re making two requests to the same API endpoint in Umbraco to generate one page, which seems inefficient. Fortunately, next.js’ awesome implementation of the javascript fetch feature, means the app will only make one request, so long as we’re using the force-cache property in the service file.
/**
 * Gets the page's dynamic metadata from Umbraco
 * @param pageSlug the slug for this page, which will be used to query Umbraco
 * @returns the page's metadata
 */
export async function GenerateMetadataAsync(pageSlug: string): Promise<Metadata> {

    const thisPage = await GetPageAsync(pageSlug);

    const data = {
        title: thisPage.properties.metaTitle,
        description: thisPage.properties.metaDescription,
    }
    return data;
}
The site now contains dynamic metadata, with a default fall-back value. The <title> tags are all in the format “metaTitle | Demo Umbraco next.js Site”.

Rendering Umbraco Content in a next.js Front-end
next.js page.tsx files structure
In next.js, page.tsx files are structured a lot like cshtml views. A model is optionally injected into the page.tsx, then we run through data-gathering, logic, and finally render the HTML.
Pass the model
Our page.tsx files are passed a { params } object automatically by next.js. These models contain parameters relating to the page. For example in routes managed by ./[…slug]/page.tsx, the params object will contain an array of strings describing the page URL. So http://localhost/blog/blog-post-1 will contain params.slug = [‘blog’, ‘post-1’].
Gather the data
Earlier in the post, we covered setting up the Umbraco service in typescript. We can now use that service in anger. In the site’s ./src/app/[…slug]/page.tsx file by calling the two methods. GetPageAsync collects data about this page, and GetChildrenOfDocumentAsync which collects data about this page’s child pages.
The result of the GetPageAsync are as follows:
{
    "contentType": "article",
    "name": "Unleashing the Power of Next.js: A Comprehensive Guide",
    "createDate": "2024-02-28T12:01:58.0990723",
    "updateDate": "2024-02-29T16:59:37.900387",
    "route": {
        "path": "/blog-posts/unleashing-the-power-of-nextjs-a-comprehensive-guide/",
        "startItem": {
            "id": "c59a3527-d045-4ef3-826b-e969aeb4245f",
            "path": "website"
        }
    },
    "id": "ac31e91a-6040-4715-b026-fa870542ced6",
    "properties": {
        "metaTitle": "Unleashing the Power of Next.js: A Comprehensive Guide",
        "metaKeywords": [
            "Next.js",
            "React Framework",
            "Server-Side Rendering (SSR)"
        ],
        "metaDescription": "Explore the power of Next.js, a popular React framework, with this comprehensive guide. Learn about its features, benefits, and how to get started with building fast, optimized, and SEO-friendly applications.",
        "contentBlocks": {
            "items": [
                {
                    "content": {
                        "contentType": "rTEElement",
                        "id": "8f85ea4f-9bc0-4d9c-bbe5-141a91af8939",
                        "properties": {
                            "richText": {
                                "markup": "<h3><em>AI Generated Content</em></h3>\n<p><em>[This content was auto-generated by chat.mistral.ai, and has not been edited]</em></p>",
                                "blocks": []
                            }
                        }
                    },
                    "settings": null
                },
                {
                    "content": {
                        "contentType": "rTEElement",
                        "id": "92750969-c55e-4afe-830b-72dcd1ec29a9",
                        "properties": {
                            "richText": {
                                "markup": "<p>Next.js is a popular React framework that enables developers to build server-side rendered (SSR) and statically exported React applications. Created by Vercel (formerly Zeit), it simplifies web development by providing an optimized and streamlined experience. This blog post aims to introduce you to Next.js, its features, benefits, and how to get started with it.</p>",
                                "blocks": []
                            }
                        }
                    },
                    "settings": null
                },
                {
                    "content": {
                        "contentType": "mediaItem",
                        "id": "35f14823-1856-4ad2-8a78-9f64f7a2b412",
                        "properties": {
                            "mediaElement": [
                                {
                                    "focalPoint": null,
                                    "crops": [],
                                    "id": "72c2c63d-8fbc-4a49-a28e-43f464f925be",
                                    "name": "Umbraco Logo Blue1",
                                    "mediaType": "Image",
                                    "url": "/media/hpdme2v2/umbraco_logo_blue1.png",
                                    "extension": "png",
                                    "width": 1081,
                                    "height": 1081,
                                    "bytes": 20196,
                                    "properties": {}
                                }
                            ]
                        }
                    },
                    "settings": null
                },
                {
                    "content": {
                        "contentType": "rTEElement",
                        "id": "7b300cfb-c985-419d-8da7-e13c3d2c5ae5",
                        "properties": {
                            "richText": {
                                "markup": "<h3>Features of Next.js</h3>\n<ol>\n<li>\n<p>Automatic Server-Side Rendering (SSR) Next.js automatically provides server-side rendering for every page, improving performance and SEO. It generates static HTML during the build time, which can be served by any CDN, resulting in faster load times and lower server costs.</p>\n</li>\n<li>\n<p>File-Based Routing Next.js uses a file-based routing system, which means that the file structure determines the URL routing. This makes it easy to create and manage routes for your application, without the need for complex configuration.</p>\n</li>\n<li>\n<p>Code Splitting and Optimization Next.js automatically splits your code into smaller bundles, which are only loaded when needed. This results in faster page load times and a better user experience.</p>\n</li>\n<li>\n<p>API Routes Next.js allows you to create API routes directly in your application, making it easy to build serverless functions. These API routes can be used to handle data fetching and manipulation, and they can be accessed from both the client and server-side.</p>\n</li>\n<li>\n<p>TypeScript Support Next.js has excellent support for TypeScript, which can help you catch errors during development and improve the overall quality of your code.</p>\n</li>\n</ol>",
                                "blocks": []
                            }
                        }
                    },
                    "settings": null
                },
                {
                    "content": {
                        "contentType": "rTEElement",
                        "id": "f246fd43-7aa6-46a6-9017-8ec3503509e9",
                        "properties": {
                            "richText": {
                                "markup": "<h3>Getting Started with Next.js</h3>\n<p>To get started with Next.js, you'll need Node.js installed on your machine. Once you have Node.js, you can create a new Next.js application using the create-next-app command:</p>\n<div class=\"rounded-md\" style=\"color: rgb(212, 212, 212); font-size: 13px; text-shadow: none; font-family: Menlo, Monaco, Consolas, 'Andale Mono', 'Ubuntu Mono', 'Courier New', monospace; direction: ltr; text-align: left; white-space: pre; word-spacing: normal; word-break: normal; line-height: 1.5; tab-size: 4; hyphens: none; padding: 1em; margin: 0.5em 0px; overflow: auto; background: rgb(30, 30, 30);\">npx create-next-app@latest my-app</div>\n<p>This will create a new directory called my-app with a basic Next.js setup. You can then start the development server with:</p>\n<pre><span>cd my-app\n</span>npm run dev</pre>\n<p>This will start your application on <a href=\"http://localhost:3000\">http://localhost:3000</a>.</p>\n<h3>Conclusion</h3>\n<p>Next.js is a powerful React framework that simplifies web development and provides a great developer experience. With features like automatic server-side rendering, file-based routing, and code splitting, it enables you to build fast, optimized, and SEO-friendly applications with ease. Whether you're a seasoned developer or just starting out, Next.js is definitely worth checking out.</p>",
                                "blocks": []
                            }
                        }
                    },
                    "settings": null
                }
            ]
        }
    },
    "cultures": {
        "en-us": {
            "path": "/blog-posts/unleashing-the-power-of-nextjs-a-comprehensive-guide/",
            "startItem": {
                "id": "c59a3527-d045-4ef3-826b-e969aeb4245f",
                "path": "website"
            }
        }
    }
}
Rendering the content
In next.js, similarly to .Net, we can render content directly in the page.tsx file, or we can call a custom Component, or we can do a mixture of the two approaches. The rendering techniques are very similar to ViewComponent or Partial views in cshtml.
Rendering a Component
To demonstrate component rendering, the site has a custom <Header> Component at ./src/app/Common/header.tsx. The component accepts an Umbraco Page as its arguments, and returns a large title above a breadcrumb.
To generate the header, the name property is picked from the JSON object above, and added to a <h1> tag:
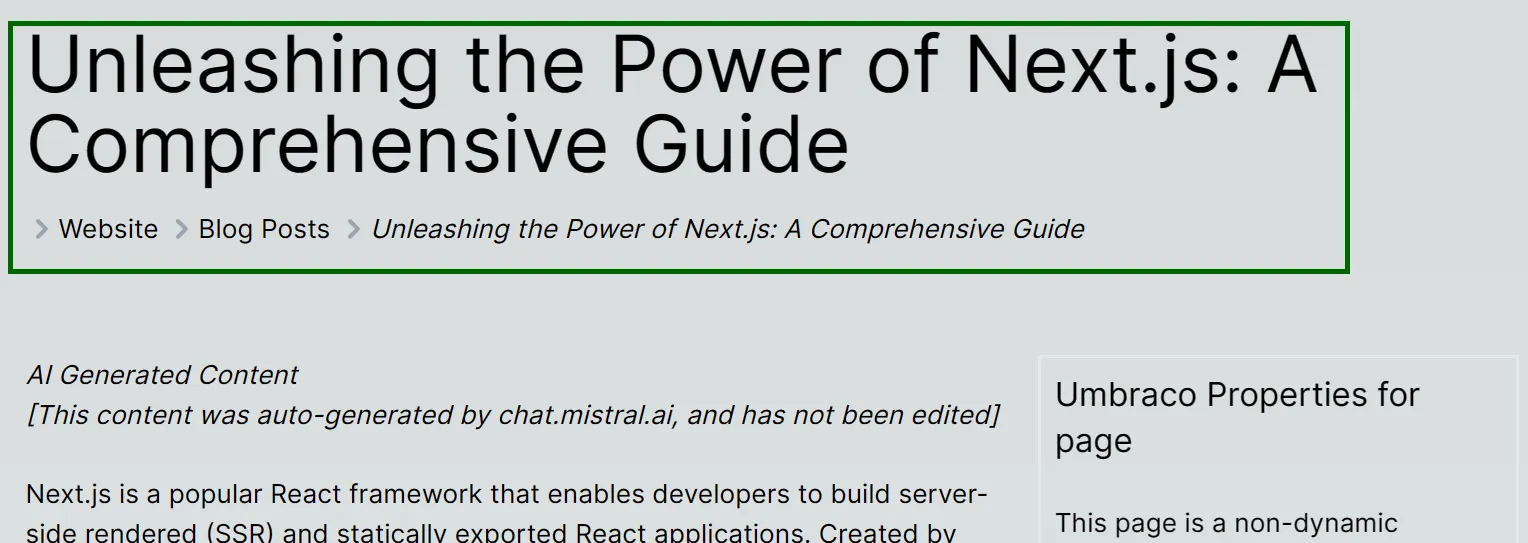
<h1 className='text-5xl mb-4'>{thisPage.name}</h1>To render the breadcrumb, the <Header> component queries Umbraco for this page’s Ancestors via the Umbraco typescript service’s GetAncestorsOfDocument method. It then creates an HTML list <ol> element, and populates it.
<ol className='inline-flex items-center space-x-1'>
    {
    /**
     * Check the pageAncestors.items has any content, and if so, render the breadcrumb
     */
    pageAncestors.items && (
        pageAncestors.items.map((ancestor: any) => (
            <li key={ancestor.id} className='inline-flex items-center'>
                <svg className="rtl:rotate-180 w-3 h-3 text-gray-400 mx-1" aria-hidden="true" xmlns="http://www.w3.org/2000/svg" fill="none" viewBox="0 0 6 10">
                    <path stroke="currentColor" strokeLinecap="round" strokeLinejoin="round" strokeWidth="2" d="m1 9 4-4-4-4" />
                </svg>
                <Link href={ancestor.route.path}>
                    {ancestor.name}
                </Link>
            </li>
        ))
    )}
    <li className='inline-flex items-center italic'>
        <svg className="rtl:rotate-180 w-3 h-3 text-gray-400 mx-1" aria-hidden="true" xmlns="http://www.w3.org/2000/svg" fill="none" viewBox="0 0 6 10">
            <path stroke="currentColor" strokeLinecap="round" strokeLinejoin="round" strokeWidth="2" d="m1 9 4-4-4-4" />
        </svg>
        {thisPage.name}
    </li>
</ol>
Take special note of the use of pageAncestors.items && ( . This line of code checks that the property items has any entities before performing the rendering. It’s a very useful function in React applications.
Rendering Umbraco Blocklist items in next.js
The Umbraco application has a Blocklist Item property on each content page. These are slightly more challenging than the <Header> component’s breadcrumb. While all page headings follow a predictable structure (all pages have a title and breadcrumb path), Blocklists can contain arbitrary dynamic data.
To deal with this, we’ve created a RenderUmbracoBlocklistRow at
./src/app/Common
/render-umbraco-blocklist-row.tsx.
The method runs a switch statement on the BlockList Row’s contentType
property, and then calls an appropriate renderer for that BlockList Row
item.
export default function RenderUmbracoBlocklistRow({ content, settings }: UmbracoBlocklistRowItem) {

    /**
     * If the block is configured as hidden, do not render it
     */
    if (settings?.properties?.hide) {
        return;
    }

    switch (content.contentType) {
        case 'rTEElement': {
            return RenderRichTextRow(content);
        }
        case 'mediaItem': {
            return RenderImageRow(content);
        }
        default:
            console.error(`did not render content of type [${content.contentType}]`)
            break;
    }

    return (<>
        <p>rendering {content.id} of type {content.contentType}</p>
    </>
    )
}
If the BlockList Item is of type rTEElement, it’s passed to the Rich Text Editor renderer. If it is of type mediaItem, it is passed to the media renderer. If the contentType is unrecognised, an error will be raised in the node.js console. These renderers can be found at ./src/app/common/blocklistcomponents
The method also checks the BlockList Item’s settings to check if this component is configured to hide. If configured, the rendered returns early.
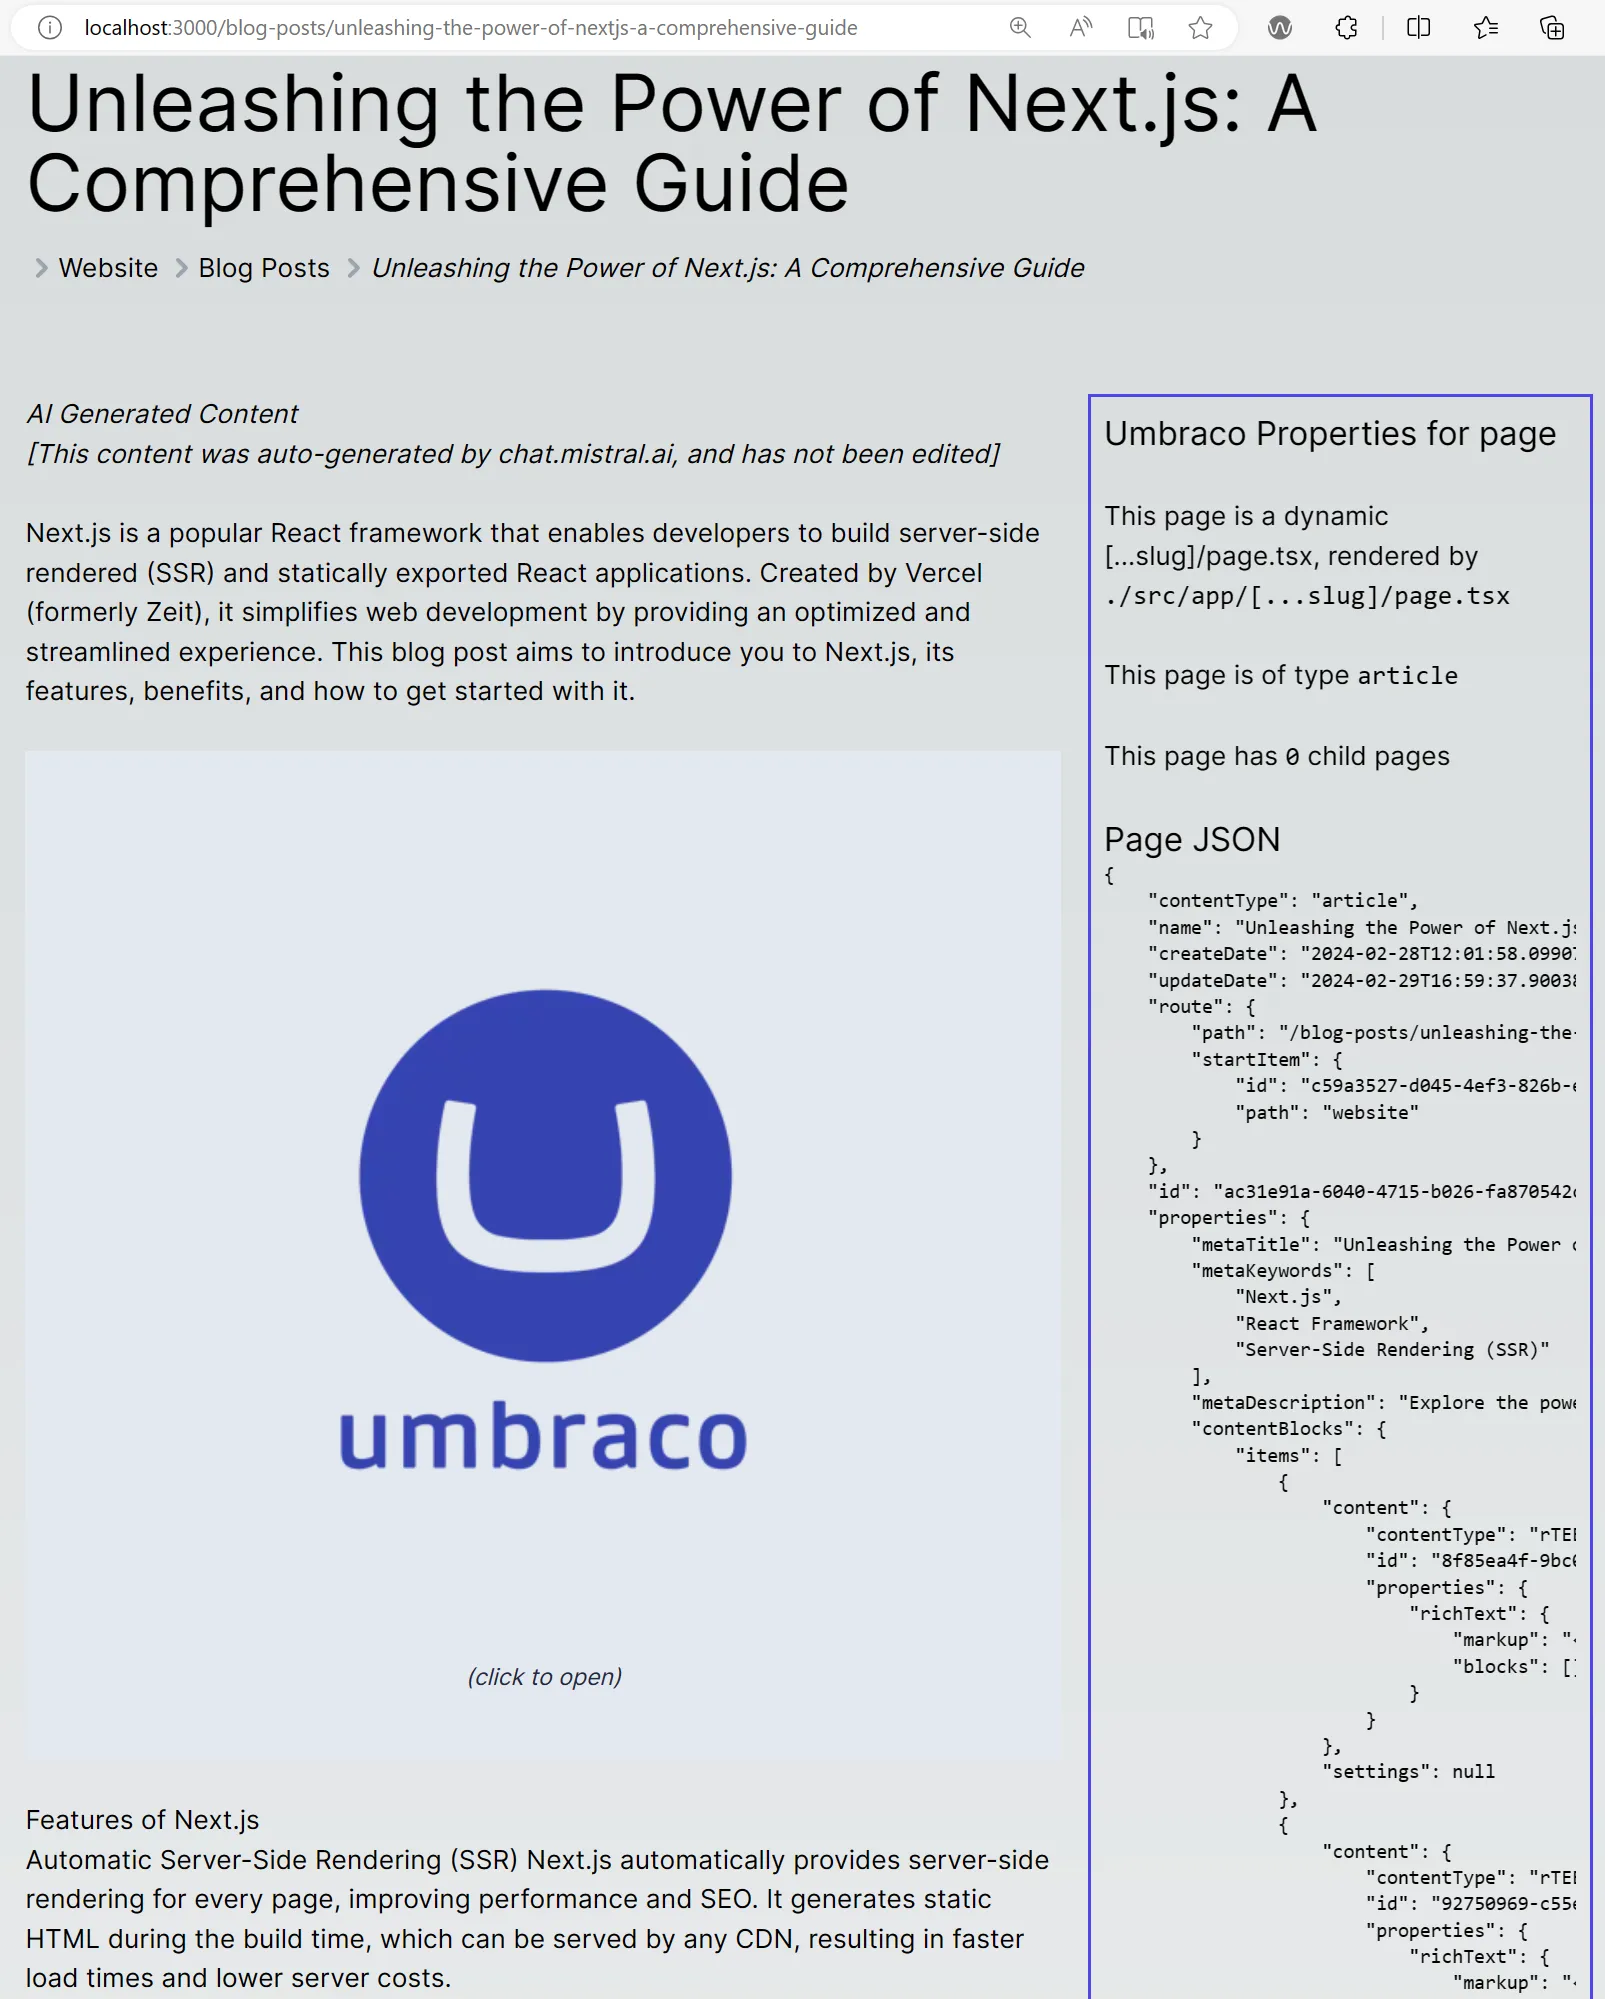
Once implemented, the site should render HTML styled webpages, as above.
This article has described how to implement a next.js front-end for an Umbraco application. The source code can be found on github here: https://github.com/Etive-Mor/Umbraco-NextJs-Demo, and a working version of the generated website can be found here: https://etive-mor.github.io/umbraco-nextjs-demo/.